Currently I'm building the first parts of my truck's furniture system. The system is based on gridbeam, an awesome simple DIY construction system from the 1970's. Practically this means: boxes, room partitioning walls, shelves, desks etc. all use the same sheet material and connector elements and with the same compatible hole pattern, so one can build everything from the same set of elements, and can reuse the parts from a no longer needed object to build something else. Or reconfigure the furniture according to current demands, using an inbus wrench.
I'm starting to build my furniture with some simple storage boxes that will be secured to the wall in several layers, yielding a big 70 cm deep shelf for general storage. Both this box system and gridbeam itself are detailed in the interface specs part of the EarthOS document. But here's a quick overview of my design choices:
- Compatible with ISO pallets. Size is 700 x 350 x 350 mm, together with with handles and corner elements etc. up to 800 x 400 x 400 mm is allowed.
- Same size walls. The basic wall size is 350 x 350 mm, and in this case I build double-depth boxes, so some walls are 700 x 350 mm. These larger walls could also be created by combining two of the smaller walls with aluminum sheet metal connectors; and likewise for even larger boxes. To allow creating a box from just same-sized walls, the walls have 45° beveled edges.
- 50 mm gridbeam system. This means, all sheet material has a 50 x 50 mm hole pattern starting 25 mm from all edges (holes are here only around the edges, more holes can be added on demand). Holes in boards are 8.5 mm for M8 bolts, but in the case of boxes fitting for M6 sleeve nuts. Holes in aluminum connector elements are 6.5 mm for M6 bolts.
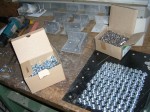
- Modified hammer-in nuts. I really had a problem finding reasonably priced sleeve nuts for going into the board holes – I'm just not paying 1 EUR and more for one lathed sleeve nut, that would be 55 EUR per box for 'em alone. So I finally tried ordinary M6x8 hammer-in nuts with their four spikes, and just cut away the spikes with tinsnips. By letting 1 mm of the spikes in place, these nuts will not even free-rotate when at the loose end and turning a bolt into them. They have enough grip in wood that way, while the sheet wood and the nut is still reusable infinitely (which was not the case with the spikes in place).
- Bolts used. Currently M6 x 13 stainless steel (A2-70) bolts with inbus head. Used together with a washer to secure the bolt against loosing and to better distribute the force to the (relatively soft) aluminium sheet metal.
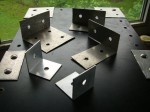
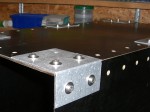
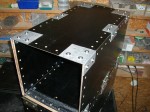
- Apt for cheap and salvage materials. I'm currently creating the corner elements from simple aluminum sheet metal that I had lying around and that can be had from the local recycling yard nearly for free (as in free beer, not as in FREE BEER). Using 50 x 50 mm and 100 x 50 mm aluminum L-profile is also possible and looks better (examples in second picture) but is of course more expensive and less autarkic. Also, one can use many different types of material for the box walls: any thickness will fit because of the beveled edges and because the box's outer measures are standardized, not the inner ones.
Writing this I realize how trivially simple this design is. Yet the simple ones are hard, for whatever reason. I had developed thoughts for the box system over months, and even started building one variant which was way too complex and too expensive. The current variant emerged after some great, inspiring discussions with my Dad on the matter. (I should know where my hacker genes come from ;))
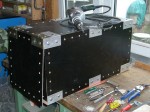
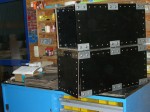
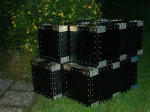
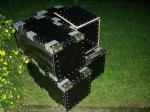
And here are some pictures of the current progress with the boxes. (Some parts are obviously still missing: corner elements for stacking, handles, a flap, locking bolts.)
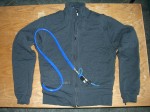
See this unrelated item in the media gallery? It's a rare Thermoflash fluid-heated jacket that I got as a bargain on eBay. Can keep everybody warm through German winter. Yep, really everybody 😉 Normally used on motorbikes and connected to the engine's cooling circuit via a heat exchanger and digital temperature control.
Leave a Reply